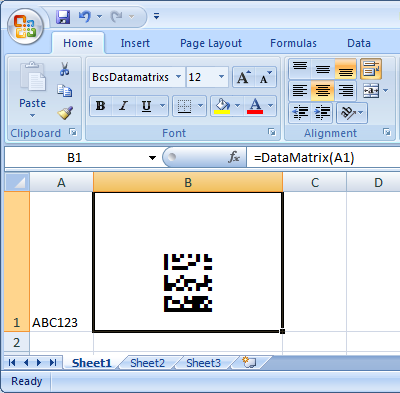
Generate Data Matrix Barcode in MS Excel
Generate Data Matrix Barcode in MS Excel
1. Start Microsoft® Excel® first.
If you are using Excel 2000 or 2003, click menu ===> Tools ==> Macro ===> Security. Choose Low security level.
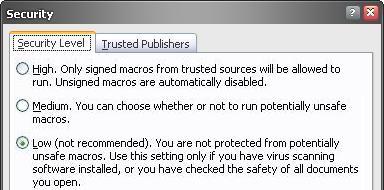
If you are using Excel 2007 / 2010 / 2013 / 2016 / 2019, click the Microsoft Office Button.
![]()
![]()
![]()
Then click Excel Options, choose Trust Center. In the Macro Settings category, under Macro Settings, choose "Enable all macros" as shown below.

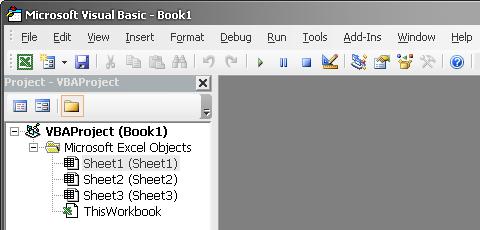
2. Press ALT + F11 to open Microsoft® Visual Basic editor.
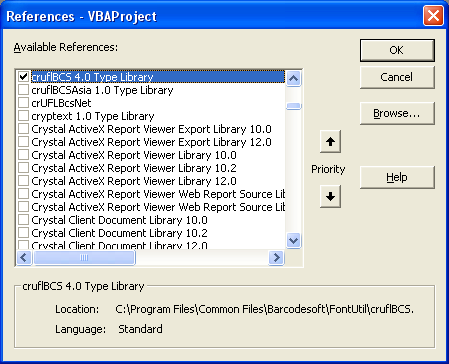
3. From Visual Basic editor, choose menu Tools ===> References. It will popup a dialog. Click Browse button and choose cruflbcs.dll from your working folder.
Usually it's under C:\Program File (x86)\CommonFiles\Barcodesoft\Fontutil folder.
Click the checkbox beside crUFLBcs 4.0 Type Library as shown below. Then click OK button.
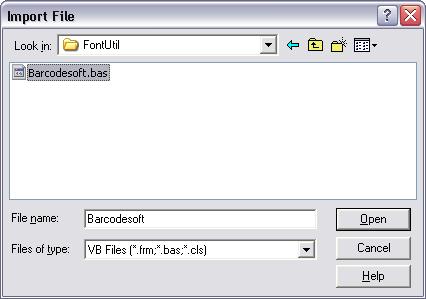
4. Press Ctrl+M, it will popup a dialog, choose barcodesoft.bas under C:\Program File (x86)\CommonFiles\Barcodesoft\Fontutil folder. Then click "Open".
If you don't find barcodesoft.bas, please download it from Data Matrix.
5. Close Visual Basic and go back to your spreadsheet. Now, you can use the following macro to encode data: datamatrix. When you have lots of data to process, you can just copy and paste the Data Matrix macro to the whole column / row of data. All your Data Matrix will be ready immediately.
=datamatrix(xxx)
Please use cell reference to replace xxx in the formulas as shown below.

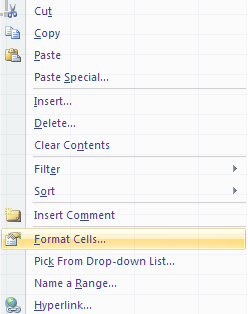
6. Right click Cell B1, choose Format Cell from context menu as shown below.
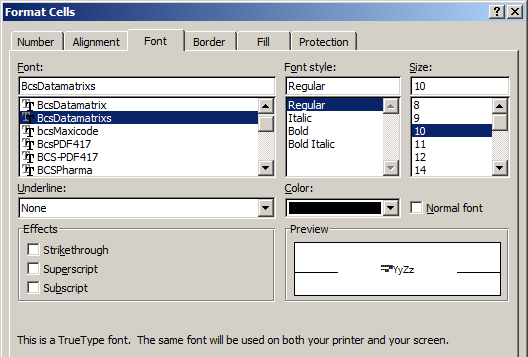
7. Click Font tab and choose BcsDatamatrixS as font typeface as shown below.
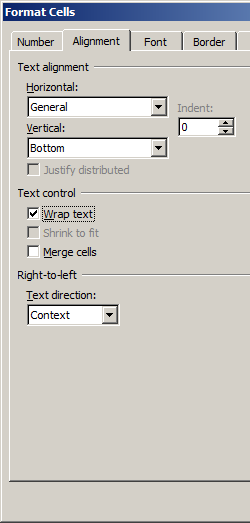
8. Click Alignment tab and select "wrap text" as shown below.
9. Click OK and you should be able to see Data Matrix barcode in your Excel spreadsheet now. There might be a small gap between different lines of Data Matrix. However, this won't be an issue when you scan the printed Data Matrix because bcsDatamatrixS true type font is designed to reduce this gap to mininum.
